|
Demonstrations - Overview |
|
To demonstrate something in the Study Technology means: to show something by using physical objects that represent the thing, or drawing the thing. When you make a Demonstration you show some principle, idea or datum by using small objects that represent it. This is usually done on a table. The student uses various small objects to represent elements of the idea or datum. Also, he can make small objects in clay that are representative as in Clay Demonstrations. The two most common methods used for making Demonstrations are: (1) Demo Kit Demonstration
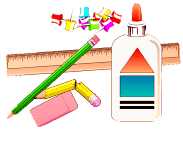
Demo Kit Demonstration ("Demo") The student can make Demos on his own to help him get something. Sometimes his checksheet requires him to do a Demo. When a student is required to do a Demonstration he simply takes a number of Demo Kit items and has them represent elements of the ideas he studies. Example: The student is reading about how he has to go
back and find misunderstood words in the materials if he suddenly feels he
doesn't understand what he is reading. He is reading about how another student
can help him with that. Demos like that can be done by a student by himself. He would do this as a help to figure out what exactly the textbook is talking about. It can also be done to another student (or the supervisor), where the student would explain the parts and actions as he goes along with the Demo. But the point is: He has to show it, not just explain it with words.
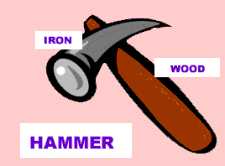
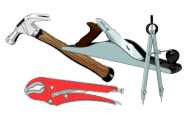
Clay Demonstration ("Clay Demo") The student can do it to clarify something described in the materials for himself and when the checksheet calls for a Clay Demonstration. The checksheet will call for Clay Demonstrations for the most important data, principles, and ideas in the course materials. Clay Demos help give a better balance of mass and significance. They give the student an opportunity to confront, "touch", create, and outflow using the data taught. The student is given a definition, action, or situation to demonstrate. He then does this in clay. He labels each part as he goes along. The clay has to show the thing. It is not just a blob of clay with a long text on a label on it. The student uses small strips of paper for labels. He writes the name of the part on the label and attaches it to the Clay Demo. The whole demonstration then has an overall label of what it is. On the check-out the student leaves the overall label on the table, text down so it can't be read. The student must be silent. He is not allowed to explain or say anything. Unless the person checking it out can see what it is it is not given a pass. The person checking it out is not allowed to ask any questions. He just looks at the Clay Demonstration; he has to be able to figure out what it is by looking at it. He then tells the student before turning the overall label to see if it was correct. If he could not see what it was it is a flunk. Clay Demonstrations must not be reduced to a verbal examination of the student nor to significance by long-winded labels of individual parts. The clay shows it, not the labels. The clay has to demonstrate it. The student must learn the difference between mass and significance. Example: Let's say the student has to demonstrate a hammer in clay (see picture above). He makes the hammer head in a dark gray color of clay. He puts a label "Iron" on it. Then he makes the hammer shaft, using brown or yellow clay. He makes a hole in the hammer head (using a pencil or a special tool) and sticks the one end of the shaft through that. He labels the shaft "wood". Then he writes the overall label "Hammer" and turns it upside down next to the Clay Demonstration. Now the person checking it out is called over. The person checking it out asks no questions and flunks any attempts on the part of the student to start a conversation while he is checking it out. It is done in silence. He looks at it and figures out it is a hammer. He says, "That is a hammer" and turns the overall label. The student is given a pass as the Clay Demonstration showed it clearly enough. If Clay Demonstrations are not brightening up the student they have been done incorrectly. The student may be in such a rush to put aside real learning for the sake of speed. Clay Demonstrations done right , and actually showing what was to be demonstrated, are very effective in helping the student understand the data which will result in the data being retained.
Use of Demo Kit Apparently he is not applying the Study Technology correctly. Flunk him and get him oriented toward application, locate and handle any misunderstood words in the materials and get him to re-study it before a new check-out. Demos in check-outs are used when the twin or supervisor asks him to. The twin can ask the student to demonstrate anything from the materials. Checksheet Demos are done when listed on the checksheet. If a student while studying does not quite grasp something, and has looked up the words, he should use a Demo Kit to work it out. This is not demanded. It is the student's choice. Often, in such a case, it is advised for the student to go over to the clay table and work it out in clay per Clay Demonstration (given in full later).
Other Types of Demos
Graphics Demo
A rule of thumb that works in practice is, if you cannot demonstrate something in two dimensions you have it wrong. This is used in engineering and architecture. If it can't be worked out simply and clearly in 2 dimensions there is something wrong and it can't be built. In those professions one wouldn't consider writing the step-by-step instructions without first having it worked out fully in diagram form on paper. When a graphic representation gets too complicated or can't be made at all there is something wrong.
Another example would be a navigator using his charts. He plots where the ship is and where it is going and can read all he needs to know directly off the chart. Are there any barriers he has to avoid? What should his compass course be? What is the distance? and so on.
The Actual Thing The Human Mind Summary 1. Demonstration by showing the actual object, including using photos and videos 2. Clay demonstration: Used to demonstrate existing data, etc. This action adds mass to the significance and is of value where the actual thing is not present or cannot be shown visibly. 3. Using a Demo Kit: This is the method used in check-outs to detect glibness. 4. Graphics demonstration: Used in engineering, organizing charts and in numerous other places to show lines, flows, how things work or go together, etc. It can also be a simple kindergarten type drawing used to work things out much as you do with a Demo Kit. The student draws a situation that illustrates the point he is learning. He writes on the drawing what the different parts are, using arrows. All of these four methods are for use and are part of the Study Technology.
|